MOTOR CARRIERS BEWARE: FMCSA DOES NOT “CERTIFY” ELDS.
March 2017, TruckingInfo.com – Feature
By Deborah Lockridge
If you see an announcement that an electronic logging device has been “FMCSA certified” to meet the new mandatory ELD regulations that go into effect Dec. 17, you might assume that the Federal Motor Carrier Safety Administration has performed some sort of testing to verify that that the ELD does in fact comply with those regulations.
That assumption would be wrong.
Earlier this year, FMCSA posted a notice on its Facebook page that “some ELD manufacturers are improperly marketing their devices as ‘FMCSA-certified.’ This is incorrect. FMCSA maintains an online registry of devices vendor-certified by the manufacturer.”
In guidance last September, FMCSA advised, “Prior to purchasing an ELD, carriers and drivers should confirm that the device is certified and registered with FMCSA and listed at this website: https://3pdp.fmcsa.dot.gov/ELD/ELDList.aspx. Devices not vendor-certified by manufacturers and registered with FMCSA may not be compliant with the FMCSRs.”
But in reality, there’s no guarantee that the ones on the list are actually compliant, either.
“In order to certify their product, ELD manufacturers simply conduct their own tests,” explains Alexis Cappelle, ELD program manager for Continental Corp. “However, the tests may or may not follow FMCSA’s test specifications. As a result, fleets may not know if an ELD registered on FMCSA’s website is actually compliant. A system registered today may be found non-compliant tomorrow and removed from the list.”
John Seidl, a longtime commercial enforcement officer who’s now a transportation consultant with Integrated Risk Solutions, puts it a bit more bluntly: To get on the list, “In layman’s terms, you just say, ‘I’m an ELD.’”
Tom Cuthbertson, vice president of regulatory affairs with Omnitracs, explains that “it’s a registration process; it’s not a certification process. At this point FMCSA, they’re not vetting documentation.”
Joel Beal, general manager of Loadtrek, has been in the electronic logs business since 1998. Unscrupulous ELD providers, he says, “could throw together some Word docs and check a few things off and [say] ‘Voila, I’m certified.’”
Gorilla Safety, however, says “the self-certification process is not as easy as one might think. The FMCSA doesn’t just ‘trust’ that you are compliant. Instead, they ask for additional details of your product, documentation and other items important in the process.”
Cuthbertson explains that there is a list of documents ELD suppliers must upload to the website to register, such as a driver user card, instructions on transfer of data to law enforcement, malfunction and diagnostics, photos, and serial numbers of the products.
Nevertheless, Gorilla Safety admits, “With that said, there is much room for ambiguity.”
“The assumption is compliance,” says David Heller, vice president of government affairs for the Truckload Carriers Association. “Like any rule — when they issue the hours of service rule, they expect drivers to comply. They’re not going to be out there looking at these carriers… it’s up to the provider to develop the device to the specs” provided by FMCSA.
Avery Vise with TransComply, a compliance support firm for smaller carriers, says in developing this self-certification process, the agency “has not really fully taken into account… the upside of being able to entice people to buy your product because you’re registered is great enough that some of these vendors may well self-certify even if they’re not remotely compliant. Some of them have been on the list from within a few weeks of the list being available, and it seems unlikely they went through a very rigorous process.”
This is why PIT Group, a Canada-based testing group better known for its fuel efficiency testing, last year announced that it would offer independent testing and verification of ELDs.
“In advance of the ELD mandate in the U.S., a growing number of suppliers are self-certifying ELDs,” said Yves Provencher, director of the PIT Group. “But suppliers that come to us for ELD verification will differentiate themselves in the market because our testing is thorough and unbiased, and it will cover the most up-to-date requirements in the ELD rule.”
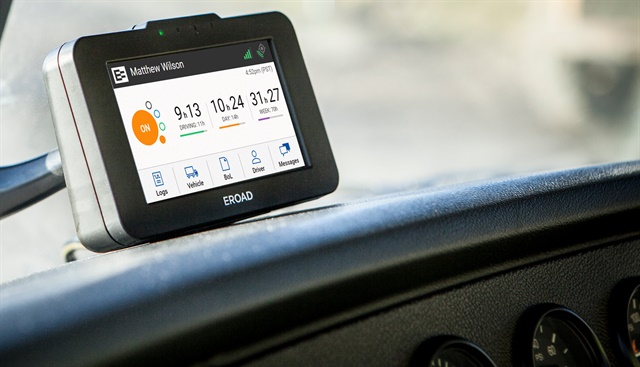
One ELD provider that has teamed up with PIT for independent verification is ERoad, which expects to be on the FMCSA ELD provider list very soon. The New Zealand-based telematics provider is relatively new to the North American market but has been in business since 2000.
Gorilla Safety is another company that has turned to outside help. It is using KPMG, one of the “big four” auditing firms, to review testing procedures, results, security governance and more.
The company explains that in self-certifying, ELD providers can use the ruling itself or the testing manual. However, “We have found many discrepancies between the ruling and the published testing manual, causing Gorilla Safety to err on the side of safety and use the ruling itself in these cases. Due to this ambiguity, it was important to Gorilla Safety to enlist the help of a well-recognized third-party for our testing procedures, test result review and final assessment.”
Gorilla says there are still challenges to using a third-party certification. “The third party provider could be engaged to test one version of the software. In this case, how do they assure ongoing versions of the software remain compliant? Secondly, how can the client be sure the testing company takes the most conservative approach, assuring compliance? Third, what is the reputation of the third-party testing firm? Is this a company you have heard of before and know, beyond a shadow of a doubt is above board? Will you stake your company on it? These are all important questions.”
If for some reason the device is discovered down the road to not be compliant, the carrier is in a tight situation. While the driver can use paper logs temporarily, the FMCSA says motor carriers will have eight days from notification to replace a noncompliant device with a compliant one.
“This is the same time allowed to take action on ELDs that need to be repaired, replaced, or serviced,” says Duane DeBrunie, FMCSA spokesman. “In the event of a widespread issue, FMCSA will work with affected motor carriers to establish a reasonable timeframe for replacing non-compliant devices with ELDs that meet the requirements.”
Vise says “this provides little comfort to carriers. It sounds as if FMCSA only plans to be flexible if there is a ‘widespread issue.’ That is of little consolation to a carrier that relied on ELD registration in its decision to purchase a system.”
Eric Witty, vice president of product at PeopleNet, says “a system that’s noncompliant should be one of the most concerning things for people. If they buy a system that claims to be compliant and FMCSA says, ‘We don’t think this is compliant and you need to get it corrected,’ you’d better make sure whoever you’re doing business with has the ability to react. Otherwise you could get into a rip-and-replace situation where you have to replace it with a new one.”
As of this writing, there are just under three dozen ELDs on the list. But if you’re looking for longtime electronic log and in-cab computing companies such as Omnitracs or PeopleNet, you may be puzzled to find they aren’t there. Some providers say they won’t feel comfortable self-certifying their e-log systems as an FMCSA-compliant ELD until they’ve completed more testing.
Pete Allen, executive VP of sales for MiX Telematics, notes that the ELD certification guidelines are a 500-plus-page document with a lot of technical details. As an ELD provider, he says, “you want to make sure you’ve got it right before you [self-certify]. We are planning to do it well before the deadline. Our platform we’re putting out in the field today is ELD ready, it just needs a software update.”
At Omnitracs, Cuthbertson explains, there’s a lot of testing to go through before they will feel comfortable registering as self-certified. “We support quite a number of HOS rulesets you have to go through. We want to make sure if our customers are using California ag rules or Texas oil field rules, all this stuff has to be tested together.”
However, ERoad says the ELD rule does not require those HOS rule sets to be built in. “There are no technical specifications that require all the standard and specialized HOS rule sets to be provided on the ELD,” says Gail Levario, vice president of strategy and market development. “It is an optional value-added feature for an ELD to have the built-in HOS functionality.” ERoad is one ELD provider that says it will soon be on the self-certified registration list, with the help of a third-party verification service from PIT Group.
One of the key sticking points cited by some ELD providers is related to how enforcement officials will check driver logs. Many officers will be using a software called ERODS (short for Electronic Record of Duty Status) to translate data from a file transferred from the ELD into a consistent format that will automatically do the math.
To get that file to the officer, it can be done via telematics (uploaded via web services or sent in an attachment to an email), or peer to peer (a short-distance transfer protocol such as Bluetooth or a USB file transfer.)
“This USB file transfer is not your $15, 6-GB thumb drive,” says Cuthbertson. “This is an approximately $100 malware-protected thumb drive that enforcement would own, not the carrier or the driver.”
Seidl says not all states will do the file transfer to ERODS. In that case, there are two options:
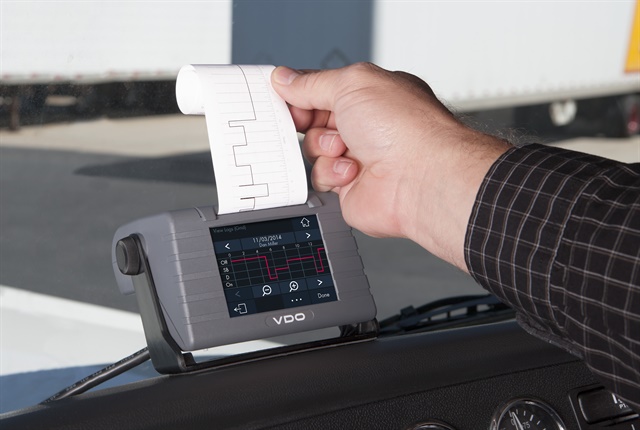
• The driver can print a copy of the log to give to the enforcement officer. Very few systems will have this capability.
• If the ELD is set up to allow it, the driver can hand the actual device to the enforcement officer to look at a display that mimics the traditional paper log grid. Cuthbertson notes that the display under ELD rules must have additional fields displayed for the officer, such as the odometer reading.
However, apparently the ERODS software is not yet ready, and FMCSA has not given ELD providers a way to test the actual files to make sure they will transfer properly. FMCSA has been clear that this is not a requirement to self-certify, but some ELD providers would feel better about putting themselves on that list if they were able to test this file.
Duane DeBrunie, FMCSA spokesman, says the requirements for the output file are outlined in the technical specifications. “The manufacturer’s responsibility is to ensure the output file meets that requirement. If it does, the manufacturer can self-certify. FMCSA is in the process of testing its ability to receive and process the output file, but that will not be part of the certification process.”
PeopleNet’s Witty explains, “It’s not that we don’t want to be [on the list] and that customers don’t constantly ask why we’re not, but even though it’s self-certification, there is a testing process…. and one of those things is being able to create and exchange a file with the FMCSA, and the FMCSA is not even done creating the web services that allow you to exchange the file. So until then, you can’t really verify it.
“We could in spirit say we’ve done all the other testing, we’ve created a file and reviewed it and believe it meets the criteria without actually exchanging it with FMSA and could be on that list today, but we’ve chosen not to because we believe until you can actually do the testing and be sure it works,” Witty says.
Beal says the fact that there is no way to really test the file makes many ELD providers nervous.
“As most developers and engineers will tell you, building a file to spec doesn’t always mean it’s going to work,” Beal explains. “There are some very smart people who question the structure of the file. We would never release a product that isn’t tested because you just never know. So we’re hoping in the next month or two we get access to some sort of testing environment.”
One company that’s not particularly concerned about it is ERoad, which was expected to be added to the FMCSA self-certified list in March.
“We’re still waiting for FMCSA to finalize the file transfer, [but] we have no doubt that after what we’ve done with the 600-page document and how well we’ve translated that into a very workable product that we’ll be able to do the same with the file transfer,” says ERoad President Norm Ellis. “That’s not an area we’re particularly concerned about and we’ll be ready to comply as soon as it’s shared with us.”
And in fact, says ERoad’s Levario, “The way that the ELD mandate has been written, the ELDs can be implemented without ERODS, because roadside inspectors will fall back to the display requirement of the ELD to be able to conduct their inspection.”
Or, they can fall back on an ELD which can print the logs, which is what Continental’s VDO Road Log ELD does. Capelle says “standards for roadside log data transfers are not yet in place, and may not be in place for years to come. As enforcement starts truly checking the logs from ELDs, scrolling through electronic displays and smartphones will be very difficult and time-consuming. Many drivers will want to look for a system that doesn’t require them to hand over their smartphone or tablet to enforcement … An ELD that can print out an instant log answers the need for fast inspections and maintaining privacy.”
Teletrac Navman is addressing the problem by guaranteeing updates to its customers as needed for compliance. “Certain aspects of technical specifications that ELD devices will be required to comply with have yet to be published,” it noted in an announcement. “As a result, Teletrac Navman will continue to upgrade existing Director HOS customers with the relevant compliance specifications when and as they become defined; ensuring customers’ Director investments remain protected after the December 18, 2017, and December 16, 2019, compliance deadlines.”
Cuthbertson was on the MCSAC subcommittee that wrote some of the technical specs. “I know what the detail is, and it’s pretty significant. I’m not going to disparage anybody; I’m just saying people should look at the products, understand the regulation, and go through the checklist to make sure all those items are there. Don’t just say, ‘They’re on the list, that’s a good product.’ It’s buyer beware.”
There is a checklist that ELD providers are supposed to go through in order to self-certify. For instance, Beal says, the system is supposed to allow you to do a diagnostic health check to make sure the system is running.
“A lot of systems have been known to go down for hours at a time and record nothing,” Beal says. There are provisions to make sure the system is tied into the truck’s electronic control module and read specific information from it, such as speed and distance. There are certain ways the information has to be displayed in the cab of the truck.
“If you’re reasonably honest and competent, you can do your own homework and figure out if [an ELD] meets [the standards] or not,” Beal says.
MiX Telematics’ Allen recommends fleets work to understand the technical requirements and make sure whoever they pick meets the requirements. “It’s a self-certification process, and just because a company fills out the form that says they do, doesn’t mean they do.” He recommends fleets consider creating test scenarios to help evaluate possible ELD vendors. For instance, how are the new editing requirements handled?
“They must have a log in for the driver; they must prompt for any unassigned mileage to find out if should go against that driver. They also need to validate any edited logs. All edits are put in the driver’s hands, but if a manager does an edit, it must be prompted to the driver to accept or reject.”
Another scenario, Allen says, is if you have certain specific hours of service challenges such as oil field rules. “I’ve been doing this 25 years and I’ve seen companies that don’t interpret the hours correctly, so the system doesn’t work for certain scenarios.”
Fleets, he says, could create a couple of such scenarios for a potential vendor and ask them to demonstrate how their system handles them, or request that a couple of units be installed and run a live test for a week or so alongside the paper logs.
Vise suggests that at the very least, “the simple thing to do is to ask the manufacturer what they have done with the product to differ from an AOBRD [the regulatory standard in effect for e-logs currently in use]. Don’t say, “Do you do this or that;’ just say, ‘What have you done.’ See if they can explain it, see if they understand the difference. Any credible supplier should know.
“The other thing they should do is they really should insist on or try to insist on a provision in their supply agreement that calls for damages in the event there’s a delisting, in the event FMCSA ultimately determines that an ELD is not compliant and says essentially that we’ll buy back the devices and compensate for any lost time because a driver or truck had to be grounded. The upshot is really that a disreputable provider is not going to agree to that. If they’re not going to stand by their product, then I would recommend moving on to someone else.”